 Why I Wanted to Roll My Own SAN
In my constant search to find the perfect SAN (Storage Area Network) I came to the realization a long time ago that it really doesn’t exist. Now of course the perfect SAN would be described differently depending on who you talk to and what the SAN is going to be used for. I wanted a SAN for the purpose of doing just about anything. That would mean I needed the SAN to be highly flexible in all possible aspects while keeping it practical and affordable since I’m working from a hobby budget, at least in my case. Given the current economic conditions that exist for most small business these days wasteful spending is not really an option if you are considering a SAN build for your company or employer.
After searching high and low for a black-box SAN solution I came up disappointed every time. Whether it was USB capable only or relied too heavily on RAID based software I really couldn’t find anything that perfectly fit my wishful-thinking requirements. My goal was to find a SAN with the following features.
Home / Small Business SAN Requirements:
- Cheap
- Nobody likes spending their own cash
- SAN solutions are already too expensive
- This market is ripe for innovation
- Hot-Swap Configuration
- Improves up-time by avoiding system shutdown to replace hardware
- Takes advantage of SATA hot-swap specification
- Small Form-Factor
- You can have your cake and eat it too. Large storage in a small space is always fashionable.
- Quiet
- In case you sleep next to it
- Low Power Consumption
- Because hibernating a SAN gets people fired
- If the SAN is going to be used infrequently, little is gained by burning through the watts
- Hardware RAID
- Personal preference on this one as the great debate between hardware/software RAID rages on
- Prefer the audible alarm signaling drive failure and error LED on drive bay (Software method less obvious)
- Dependable IO Controller
- 10+ SATA II Ports to match the 10 hot-swap drive bays
- Quality controllers will provide vast performance improvements over cheap boards
- Features like Staggered Spin-Up, Out-of-Band managements, and Audio/Visual Alarms
- RAID-5,6
- Your requirements may dictate RAID 10,50 etc..
- Are you looking for speed, safety, or both?
- Dependable 1Gb NIC Port
- Intel and Broadcom are two industry standards compliant and reliable manufacturers
- Avoid bottleneck by using a fast 1Gbps+ connection
- 1Gb connectivity minimum if using iSCSI or NFS
- 110MB Transfer Rate (WD10EARS) equates to 880Mbps. Add RAID and you are over 1Gbps
- Bootable USB Port
- Handy when you don’t have room for a CDROM and need to load the SAN OS or additional software
- On-board Video Card
- Reduce costs
- Improve airflow
- Improve simplicity
- Ventilated Case
- Hard drives are going to generate heat. A cool system is a happy system.
- Power Supply
- Capable PSU supporting 12+ HDs, MB, and CPU
- SAN Operating System
- Slick interface that makes quick effective work of slicing up your storage as you desire
- Protocols: iSCSI, NFS, CIFS/SMB, FTP (everything else would be icing on the cake)
- Upgradable Software and Hardware
- Something new and fresh is always on the horizon
- Don’t drop a ton of money on an entirely new all-in-one SAN every time some new feature comes out. Just upgrade as you need. Vendors love you a lot more if you buy a new SAN to get the latest do-dad.
From my list of requirements I was already thinking this task was going to be tricky trying to track down a “Ready-to-Run” black box SAN. I started looking at solutions like using a Drobo, but it fell short on several key areas. So I turned to direct attached storage (DAS) in the form of eSATA, but they were not network accessible. It just seemed like the market for high-end SAN features with a low end budget was non-existent. That was unacceptable to me in the end and I was determined to come up with something feasible. I knew it could be done, and for some reason the industry has always seemed to lag behind in the storage market for the prosumer techie like me. Time to roll up my sleeves and make it happen the good old fashioned way. It was time to Do It Yourself!
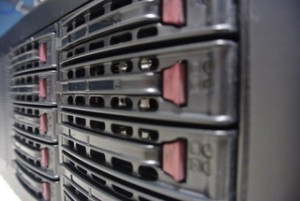
So I rolled up my sleeves and started researching components for my home made SAN. After all I was only going to use it as my backup server, VMware Host, Oracle Database Block Storage, media streaming server, home file server, and raw video data store. I just wanted to be prepared in case anything else came up. My search started with finding a good RAID enclosure, so I could see visual indicators of drive activity, hot swap failed drives, and squeeze 5 3.5″ drives into 3 case bays with the enclosure. I considered the RAID enclosure and the RAID Controller the two core important pieces of hardware I really wanted to get right the first time.
The Build
I jumped right in to researching the enclosure. I looked at so many different enclosures and the majority of these enclosures had one commonality between them. They were all cheaply constructed and of poor quality. None of them rated all that well and bothered me quite a bit as this was the keystone in my build. Right off the bat I was mildly discouraged in my quest for greatness. After stepping back and thinking about it a while I realized the majority of entry level business SANs were using Supermicro components for their SAN solutions. So I stopped beating myself over the head with a power dongle and went straight to the source. I found the Supermicro CSE-M35T-1B. In the end I was quite pleased with this purchase, especially the quality all things considered. Update: The ICY DOCK FatCage MB155SP-B would make a great RAID enclosure too.
")
Supermicro CSE-M35T-1B
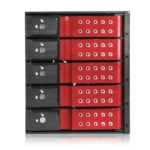
iStarUSA BPN-DE350SS-RED
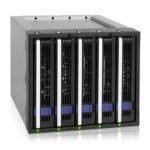
IcyDock MB155SP-B
Next on my list was the all important RAID controller. My searching lead me to an Areca ARC-1260 (I picked up one used) for their good reviews, very capable controllers and useful out-of-band web user interface for monitoring and managing the hardware aspect of the RAID configuration. This would avoid rebooting your storage area network to check a configuration, tweak a setting, or swap a failing drive. That would kind of defeat the purpose of using a SAN. Update: See the two cards below for an updated selection of popular hardware/software RAID cards.

IBM Serveraid M1015
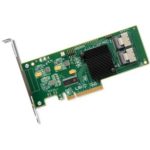
LSI Logic SAS9211-8I
Next I wanted to find a solid motherboard. Since I was quite happy with the purchase of my two Supermicro RAID enclosures I thought a Supermicro motherboard deserved consideration. In my requirements I stated on-board video and non-generic network port so this was a logical choice. I was able to hunt one down, although I admit at the time it was hard to find a single socket, embedded video, and built-in RAID controller. My strategy here was to locate my operating system hard drives away from the primary RAID controller. I didn’t want to create a single point of failure or controller bottleneck. This would allow for expanded flexibility too. So I configured two 250GB drives using RAID 1 attached to the Supermicro on-board RAID controller to protect against loosing my SAN operating system and RAID configuration. I also wanted to avoid co-locating the SAN OS drives with the hot swap production drives. I didn’t even want to take the risk of accidentally pulling an OS drive from the RAID cage. Update: See motherboards below for an updated list that meets the original requirements for this build.
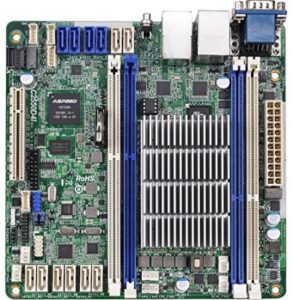
ASRock C2550D4I (Mini ITX)
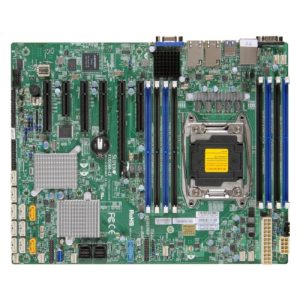
Supermicro X10SRH-CLN4F-O
Next up I had to find a home for all this beautiful hardware to reside. I was looking for something convenient to work with internally, had plenty of ventilation, fairly quiet, plenty of bays for stacking two RAID enclosures that would consume six bays, and a sleek black box feel. I’ve owned Lian Li cases in the past and found what I was looking for. I particularly liked this case because there was no unnecessary wasted real-estate on the front of the case, just nine 3.5″ bays oriented from top to bottom with a very clean look. This prevented from from purchasing a server town in turn keeping prices down and size to a minimum. Check, check and check! Update: Here are the latest cases for a good NAS build. They include Mini ITX and EATX models with internal bays and 5.25 bays for use with a SATA/SAS enclosure.
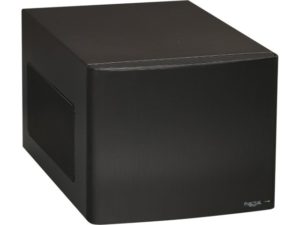
Fractal Design Node 304
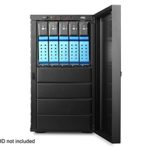
iStarUSA S-917
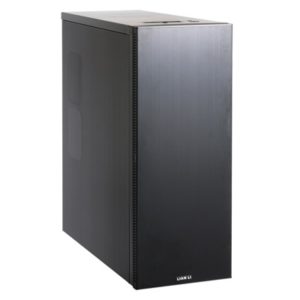
Lian-Li PC-A76
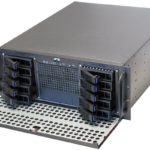
NORCO RPC-450TH
A few other items will be needed to complete your build. Don’t forget to purchase memory, a power supply unit (PSU), and the processor. For the power supply you will want to take the standard items into account along with the total number of hard drives you plan to ever use with the system. For example the average 3.5 SATA2 disk may consume 30W on spin-up. Today’s larger SATA disks consume a lot less power because of the larger cashes and combined algorithms to reduce drive head activity. If you go with a green drive like I did you are now looking at 5-7W with read-write activity and half that at idle speeds. If you select a higher end RAID controller you should have the option of using a “Staggered Drive Spin-Up”. This will help offset the power demand on boot. I selected a 600W PSU for my particular build. With both RAID cages fully loaded you would have 12 drives spinning. This will leave you with plenty of room for growth. For the RAM I used two 1Gb sticks of dual channel. Before you load your system up with RAM check the documentation for your SAN software to determine how it utilizes the memory. If it employes a caching strategy using your system RAM it would definitely be worthwhile to load your system up if performance is what you seek. I will discuss this in further detail in my second article discussing how I used Openfiler as my SAN operating system. For the CPU I happened to have a 2.2Ghz processor laying around, so I just dropped that into the motherboard. You really don’t need anything special as far is the CPU is concerned. Your critical hardware will always be the IO controller. Now iSCSI may tap some of your CPU to handle the added processing in the event you don’t have a TOE (TCP/IP Offload Engine) capable NIC. Again this is assuming you are even using iSCSI.
Everything is Assembled, Now What?
Okay, you have your newly assembled dream SAN sitting in front of you and you can’t find a power receptacle fast enough. Plug everything up, preferably though en UPS (uninterrupted power supply) after spending all that money and time. Hit the power switch and cross both fingers you avoid angering the hardware gods and having the beeps of doom unleashed upon your home or happy work place. If all goes as planned you should be walking through the BIOS configuration. Don’t forget to configure your two locally attached hard drives as RAID1 in preparation of the SAN operating system install. Save, reset, and configure your RAID adapter with the second boot. Like I said before, are you looking for speed or safety? I went with RAID5 for the time being. If I had 10 drives installed I would probably go with RAID6. At this point you are starting to realize that the sun will soon be rising after your perilous journey through Mordor, and you start to taste the deliciousness of a gummy bear dipped in peanut butter victory. Now comes the part where you select a SAN operating system for your new robot. There are two obvious choices in my mind: Openfiler and FreeNAS. I selected it for a number of different reasons, all of which I will cover. For now kick back, and pat yourself on the back by taking a Forza victory lap on your XBox One. Even better if you are doing this at work. Don’t forget the pizza poppers as they are standard geek and gamer food.
)